White Nail Designs – Elegant, Clean & Timeless Ideas
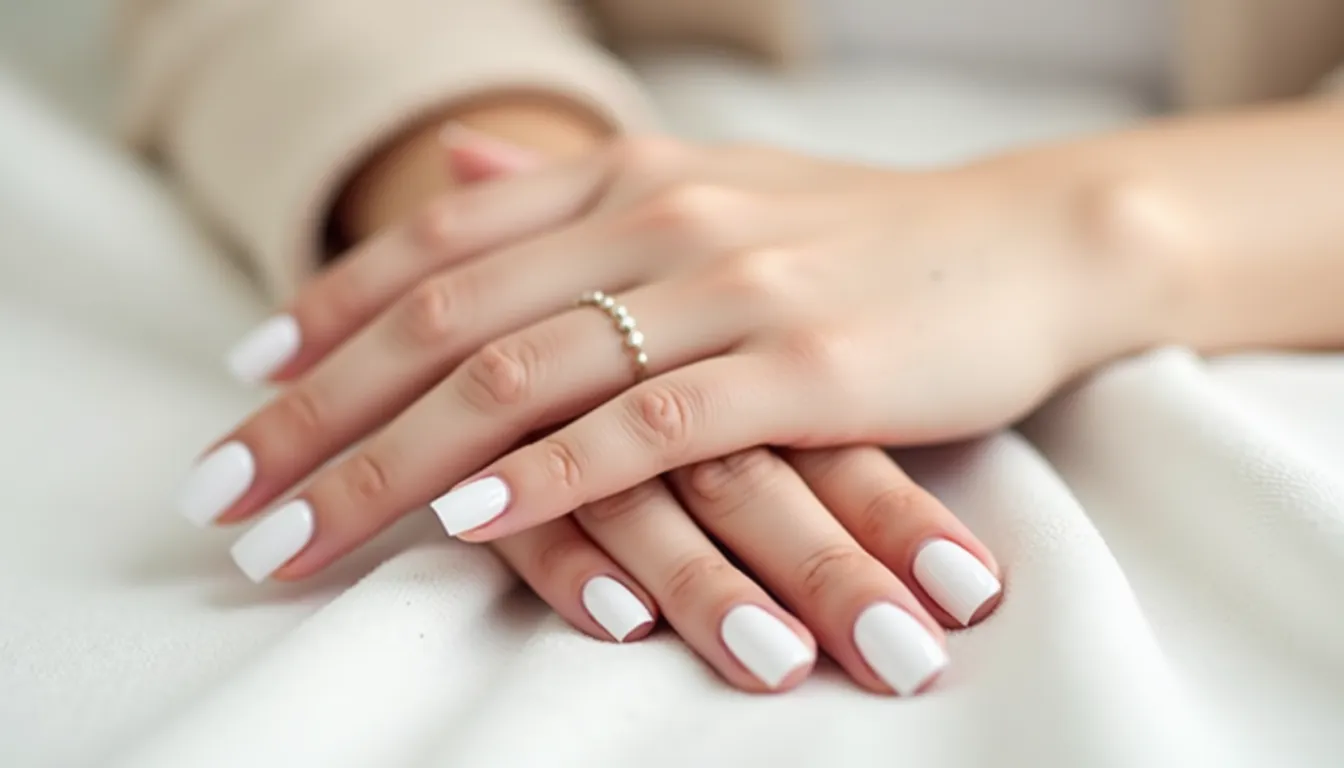
White nail designs represent the epitome of elegance and sophistication in the world of nail art. This classic color has transcended trends and seasons, remaining a go-to choice for anyone seeking clean, polished, and versatile nails. From crisp pure white to soft cream and pearl finishes, white offers a blank canvas for creativity while maintaining an air of refined simplicity.
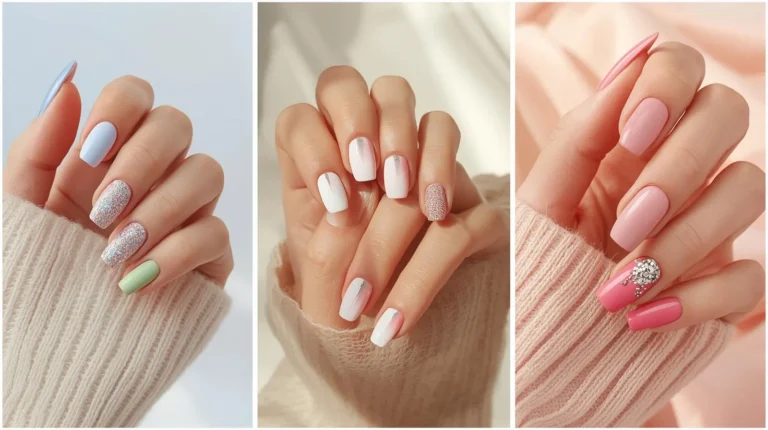
What makes white nail designs so universally appealing? White complements every skin tone, matches any outfit, and transitions seamlessly from casual daytime wear to formal evening events. Whether you’re attending a wedding, heading to the office, or enjoying a summer vacation, white nails exude freshness and style. White nail designs can be minimalist and understated or adorned with intricate details like lace patterns, delicate florals, or sparkling accents. As we explore the endless possibilities of white nail art, you’ll discover why this timeless color continues to dominate runways, red carpets, and everyday fashion alike.
Table of Contents
Essential Tools for White Nail Designs
Creating flawless white nail designs requires the right collection of tools and supplies. Quality materials make all the difference when working with white polish, as this color shows every imperfection and requires precise application. Building your nail art toolkit is an investment that pays off in professional-looking results and long-lasting manicures.
Basic Tools for White Nail Designs
Every stunning white manicure begins with fundamental essentials. A high-quality nail file helps shape your nails into your preferred style—whether square, rounded, oval, or the trendy almond shape. A buffer is crucial for smoothing the nail surface and creating the perfect base for white polish application. Base coat serves as the foundation of your white nail designs, preventing staining and helping polish adhere smoothly to your natural nails.
Your white polish collection should include various formulas and finishes. Opaque white cream polish provides classic coverage, while sheer milky white creates subtle, natural looks. A brilliant glossy top coat seals your design with shine and protection, while a matte top coat offers modern, velvety finishes for contemporary white nail designs.
Detail brushes are essential for intricate work. A fine striping brush helps create delicate lines and patterns, while a flat shader brush is perfect for applying glitter or creating ombre effects. Dotting tools in various sizes create perfect circles for florals, polka dots, or abstract designs. Don’t forget quality nail polish remover, lint-free cotton pads for cleanup, and nourishing cuticle oil to maintain healthy nails throughout the design process.
Accessories to Enhance White Nail Designs
Once you’ve mastered basic application, accessories elevate your white nail designs from simple to spectacular. Nail art stickers and decals featuring lace patterns, delicate flowers, or geometric shapes add instant sophistication to white bases. Rhinestones and crystals in clear, silver, or pearl finishes create glamorous accents perfect for special occasions.
Gold or silver striping tape adds elegant metallic lines to white nail designs without requiring steady-hand painting skills. Glitter polishes in holographic, silver, or opalescent finishes add sparkle and dimension when layered over white. Stamping plates with intricate patterns allow you to transfer complex designs onto your white nails with professional precision.
Nail art pens with fine tips enable detailed drawing, lettering, or outlining for custom nail designs. Sponges are essential for creating smooth gradient effects, while French tip guides ensure perfectly straight lines. With these accessories, your white nail designs can range from minimalist chic to elaborately decorated masterpieces.

Preparing Your Nails for White Nail Designs
Proper nail preparation is absolutely critical when working with white polish. White shows every ridge, bump, and imperfection, making thorough prep work non-negotiable for beautiful results. Investing time in preparation ensures your white nail look smooth, professional, and last significantly longer.
Begin by completely removing any existing polish, ensuring no traces of color remain. Wash your hands thoroughly with soap and water to eliminate oils, lotions, and debris that prevent polish adhesion. Trim your nails to your desired length using sharp clippers, cutting straight across and rounding the corners with a file to prevent splitting.
File your nails into your chosen shape, always moving in one direction rather than sawing back and forth. This prevents layers of the nail from separating and creating weak points. Gently push back your cuticles using a cuticle pusher or wooden orange stick—this creates a clean canvas and makes your nail designs appear more polished and professional.
Buff the surface of your nails lightly using a fine-grit buffer. This smooths ridges and creates slight texture that helps polish grip. Be careful not to over-buff, which can thin and weaken your nails. Wipe your nails with rubbing alcohol or nail prep solution to remove all oils and dust. This final step ensures maximum adhesion for your white nail designs.
Nail Prep Tips for Long-Lasting White Nail Designs
White polish can show wear and chips more obviously than darker colors, making proper preparation even more important. Always apply a quality base coat and allow it to dry completely—rushing this step leads to premature chipping and peeling. Consider using a ridge-filling base coat if your nails have noticeable texture, as this creates an ultra-smooth surface for white polish.
When working with nail designs, cleanliness is paramount. Any dust, lint, or particles will be visible under white polish. Work in a clean area and wipe your nails with lint-free pads rather than cotton balls that shed fibers. Keep your polish bottles clean, wiping the neck and cap after each use to prevent dried polish from flaking into your manicure.
For the most opaque nail designs, consider using a white base coat before your white polish. This creates a bright foundation that requires fewer coats of colored polish. Some nail artists also apply a thin layer of nude or pale pink polish before white, which can help prevent visible nail line and create a more natural appearance.
Popular White Nail Designs for Every Occasion
The versatility of white nail designs makes them suitable for literally any occasion, style preference, or season. Whether you prefer understated elegance or eye-catching embellishments, white provides the perfect foundation for countless creative possibilities.
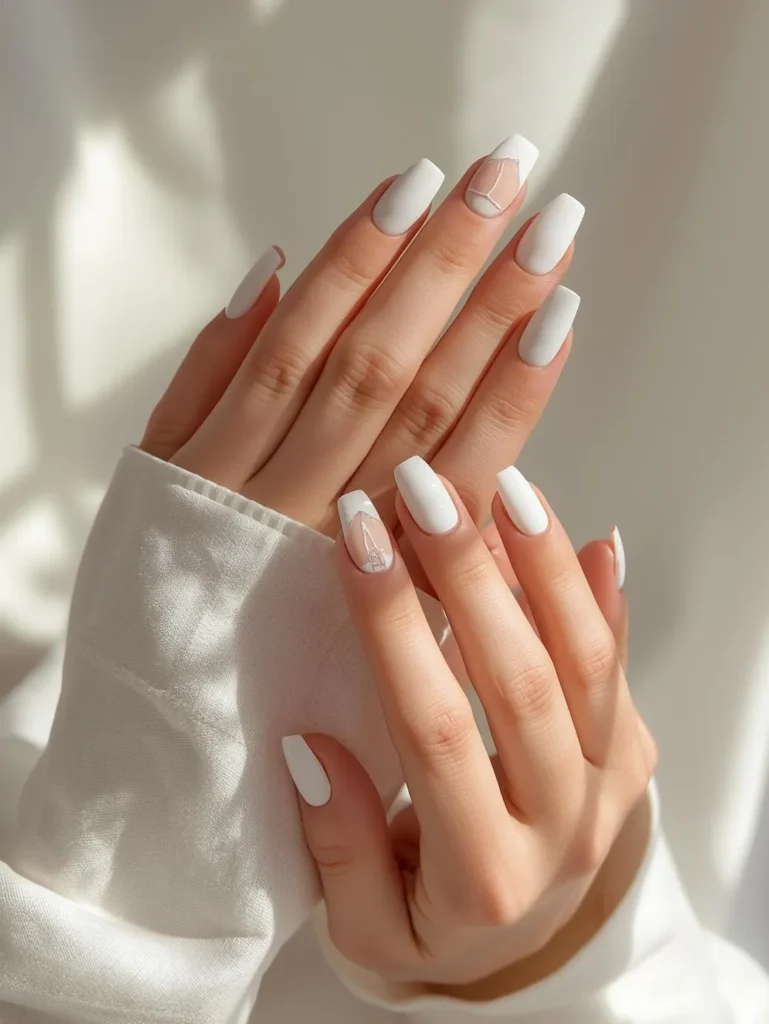
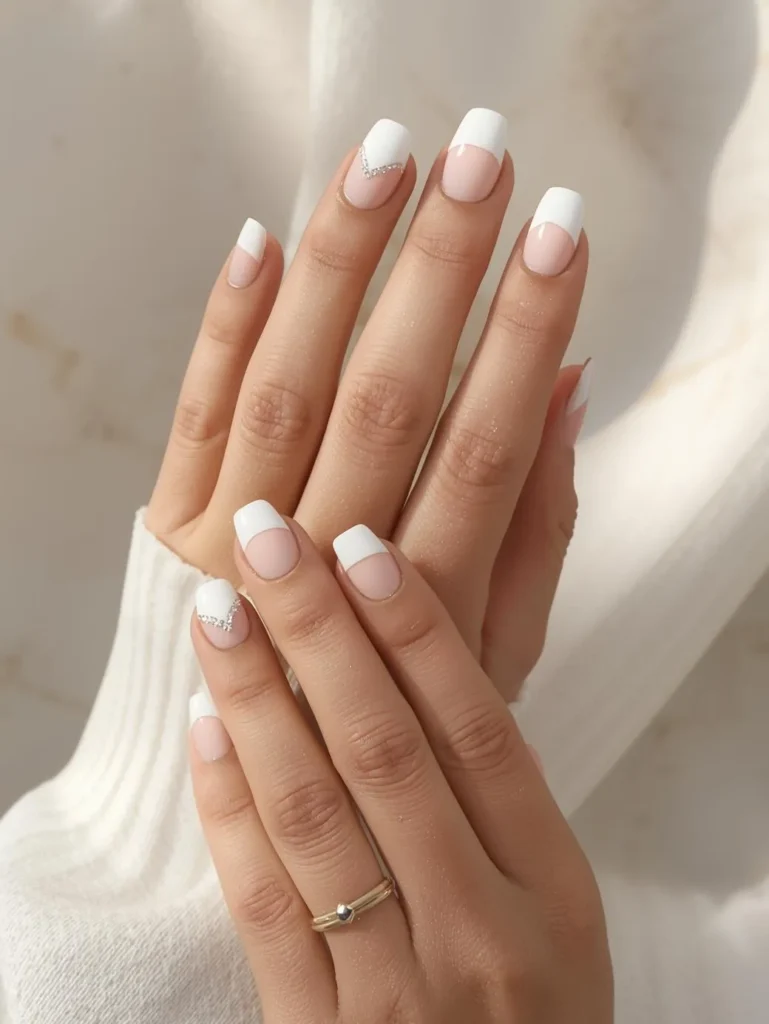
Classic French manicure with white tips remains eternally popular and appropriate for every setting from weddings to business meetings. Modern variations include reversed French tips with white half-moons at the cuticle, or angled French tips for contemporary flair. Matte nail designs offer sophisticated, velvety finishes that feel current and fashion-forward.
Glitter accent nails featuring silver or holographic sparkle on white bases create perfect balance between subtle and statement-making. Lace-effect white nail designs using stamping or hand-painting evoke romance and femininity, ideal for brides or special occasions. Marble effects swirling white with grey, gold, or soft pink create luxurious, artistic looks.
Geometric white nail designs incorporating negative space, clean lines, and minimalist patterns appeal to modern aesthetics. Floral white nail designs featuring delicate blossoms in soft pastels or metallic gold add feminine charm. Pearl or chrome finishes transform simple white nail designs into iridescent, dimensional works of art.
Trending White Nail Designs in 2025
This season’s nail designs embrace both simplicity and artistic expression. Minimalist nail art featuring single gold or black lines on white bases creates clean, contemporary looks. Negative space designs where the natural nail shows through geometric white patterns are incredibly popular for their artistic, editorial appeal.
Textured white nail designs using sugar-effect top coats or 3D embellishments add tactile interest. Cloud and sky-inspired nail designs with soft blue accents capture dreamy, ethereal aesthetics. Abstract art featuring freehand brush strokes and splatters on white bases appeals to creative individuals seeking unique manicures.
Bride-inspired white nail designs featuring lace, pearls, and delicate details have moved beyond weddings into everyday fashion. Micro French tips with extremely thin white lines offer subtle sophistication. Mixed-finish white nail designs combining glossy, matte, and metallic white on different nails create dynamic, fashion-forward statements.

Step-by-Step Guide to Create White Nail Designs
Creating beautiful white nail designs at home is achievable with proper technique and patience. Follow this comprehensive guide for salon-quality results without the salon price tag.
Start with completely prepped nails—clean, shaped, buffed, and oil-free. Apply a thin, even layer of base coat to all ten nails, making sure to cap the free edge. Allow the base coat to dry completely, which typically takes one to two minutes. Once dry, it’s time to apply your first coat of white polish.
White polish requires specific technique for smooth, streak-free application. Load your brush with enough polish to cover the nail but not so much that it floods the cuticles. Start with a stripe down the center of the nail, then fill in each side with smooth, even strokes. Work quickly but carefully, and avoid going over the same area repeatedly, which causes streaking.
Allow your first coat to dry for at least two to three minutes. White polish typically requires two to three coats for full opacity, so don’t worry if the first layer appears sheer. Apply your second coat using the same technique, building coverage gradually. For the most opaque white nail designs, a third thin coat works better than fewer thick coats.
Once your base color is completely dry—wait at least five minutes to be safe—add your chosen design elements. For accent nails with glitter, apply it carefully to selected nails. For patterns, use your detail brushes, stamping plates, or stickers according to your design plan. Work methodically, allowing each element to dry before adding the next.
Finish by sealing everything with a generous layer of top coat, making sure to cap the free edge of each nail. This protective layer is crucial for white nail designs, as it prevents yellowing, adds shine, and extends wear time dramatically. Allow your manicure to dry completely—at least fifteen to twenty minutes—before engaging in activities.
Easy and Stylish White Nail Designs for Beginners
Starting your journey with white nail designs doesn’t require professional skills. These four beginner-friendly ideas deliver impressive results with minimal effort.
Classic White with Gold Accent Stripe: Apply white polish to all nails, allow to dry completely, then carefully place a single gold striping tape line down the center of each ring finger nail. Seal with top coat. This elegant design looks intentional and sophisticated with almost no artistic skill required.
Simple White Polka Dots on Nude: Apply a nude or pale pink base to all nails. Once dry, use a dotting tool dipped in white polish to create scattered dots across each nail. Start with just three to five dots per nail for a delicate, wearable look.
White French Tips: The ultimate classic white nail design for beginners. Apply a sheer pink or nude base, then use French tip guides or freehand technique to paint clean white tips. The guides make it foolproof, even for first-timers.
White and Silver Half-Moon: Paint all nails solid white. Once dry, place half-moon nail guides at the base of each nail and apply silver glitter polish to the exposed crescent. Remove guides carefully and seal with top coat for a glamorous look.
Tips for Perfect White Nail Designs
Achieving flawless white nail designs requires understanding the unique challenges of working with white polish. These professional tips help you overcome common obstacles and create stunning results consistently.
White polish has a tendency to streak if not applied correctly. The key is using thin coats and avoiding overworking the polish. Apply each coat smoothly and quickly, resisting the urge to go back and fix imperfections while the polish is still wet. Instead, allow it to dry completely and address any issues with your next coat.
Temperature affects how white polish applies and dries. Slightly warm polish flows more smoothly, so if your polish has been stored in a cool area, roll the bottle between your palms for a minute before using. Never shake polish bottles, as this creates air bubbles that mar the finish of your white nail designs.
Lighting is crucial when working with white polish. Natural daylight shows the true color and reveals any application issues like streaking or missed spots. If working indoors, use bright, white LED lighting rather than warm yellow bulbs that can alter how you perceive the white shade.
Keep a small cleanup brush dipped in nail polish remover nearby for immediate correction of mistakes. White polish that gets on your skin or cuticles is highly visible, so clean edges are especially important. Work carefully around the cuticle line, leaving a tiny gap rather than flooding the area with polish.
Aftercare & Maintenance for White Nail Designs
White nail designs require specific aftercare to maintain their pristine appearance. White polish can yellow over time with certain exposures, making proper maintenance essential for keeping your manicure looking fresh and clean.
Immediately after completing your white nail designs, avoid hot water, cleaning chemicals, and strenuous hand activities for at least one hour. This allows the polish to fully cure and harden, preventing smudging and damage. For the first twenty-four hours, treat your nails gently to ensure maximum longevity.
Moisturize your hands and cuticles daily with quality hand cream and cuticle oil. Healthy, hydrated nails are more flexible and less prone to chipping. However, avoid getting oils directly on your polished nails, as this can break down the top coat over time. Apply moisturizers to your skin and cuticles rather than the nail surface itself.
Protect your white nail designs by wearing gloves during household chores, especially when using cleaning products, washing dishes, or gardening. Harsh chemicals and prolonged water exposure are the primary causes of chipping, yellowing, and premature wear. This simple habit can extend your manicure’s life by days or even weeks.
Reapply top coat every two to three days to refresh shine and add protective layers. This prevents the white from appearing dull or yellowed and seals any minor wear that might have occurred. Keep your top coat brush clean and free of debris for smooth application. If you notice any small chips, you can often touch them up with white polish and reseal with top coat for extended wear.
Avoid exposing your white nail designs to excessive sunlight for extended periods, as UV rays can cause yellowing. Similarly, be cautious with highly pigmented foods like berries, turmeric, or curry that might stain white polish. If you do get stains, sometimes gentle buffing with a soft buffer can remove surface discoloration without damaging your manicure.
FAQ – White Nail Designs
What are the easiest White Nail Designs for beginners?
The easiest white nail designs for beginners include classic French manicures using tip guides, simple solid white nails with one glitter or gold accent nail, white polka dots on a nude base using a dotting tool, and basic white tips with metallic striping tape accents. These designs require minimal artistic skill but deliver polished, professional-looking results. Start with these simpler styles to build confidence and technique before attempting more complex white nail designs with intricate patterns or hand-painted details.
How can I make my White Nail Designs last longer?
To make your white nail designs last longer without yellowing or chipping, always start with thorough nail preparation including buffing and dehydrating the nail surface. Use a quality base coat to prevent staining and yellowing, then apply thin coats of white polish rather than thick layers. Cap the free edge with every coat including base, color, and top coat. Wear gloves during cleaning and avoid prolonged water exposure. Reapply top coat every few days and keep cuticles moisturized. With proper care, your white nail designs can easily last two weeks while maintaining their bright, fresh appearance.
Which styles of white nails are trending this season?
Current trending white nail designs include minimalist negative space art with geometric white patterns, textured white finishes using sugar or velvet effects, micro French tips with extremely thin white lines, marble effects combining white with soft grey or gold, and chrome or pearl white finishes for dimensional shine. Abstract artistic white nail designs featuring hand-painted strokes and mixed media elements are also extremely popular. The trend emphasizes both ultra-minimalist simplicity and creative artistic expression, giving everyone options regardless of their personal style preferences.
Can I create professional-looking White Nail Designs at home?
Absolutely! Creating professional-looking white nail designs at home is entirely achievable with the right supplies and techniques. Invest in quality white polish with good opacity, proper brushes for detail work, and a brilliant top coat. The key to success with white nail designs is thorough preparation, thin coats allowing proper drying time between layers, and working in good lighting. Watch tutorial videos to learn professional techniques, practice regularly, and don’t be discouraged by initial attempts. Many nail artists who now work in salons started by practicing white nail designs at home.
How do I prevent my White Nail Designs from yellowing?
Preventing yellowing in white nail designs starts with always using a quality base coat that creates a protective barrier between your natural nail and the white polish. Avoid exposing your manicure to cigarette smoke, strong chemicals, or excessive UV light, all of which can cause yellowing. Use a top coat that contains UV protection for added defense against discoloration. Store your white polish in a cool, dark place to prevent the formula from yellowing in the bottle. If you notice slight yellowing, sometimes buffing gently with a soft buffer can restore brightness, or you can apply a fresh layer of top coat to diminish the appearance of discoloration.
Conclusion
White nail designs offer timeless elegance and versatility that transcends seasons, trends, and occasions. From classic French manicures that never go out of style to contemporary negative space art and luxurious marble effects, white provides the perfect foundation for endless creativity. The clean, fresh appearance of white nails complements every outfit, suits every skin tone, and transitions seamlessly from casual to formal settings.
The beauty of white nail designs lies in their accessibility and adaptability. Whether you prefer minimalist simplicity or elaborate embellishments, white accommodates every aesthetic preference. With proper tools, thorough preparation, and careful application techniques, anyone can achieve stunning white manicures at home that rival salon results. Start with simple designs like classic white tips or single accent nails, then gradually experiment with more complex techniques as your confidence grows.
Don’t let fear of imperfection prevent you from exploring the wonderful world of white nail designs. Remember that even professional nail artists started as beginners, and every manicure you create improves your skills. White nails exude sophistication, cleanliness, and style—qualities that never go out of fashion. So gather your supplies, choose your favorite white shade, and start creating elegant nail art that makes you feel polished and confident. Your perfect white nail designs are waiting to grace your fingertips with timeless beauty!